Showing posts with label storage solutions. Show all posts

Tuesday, July 01, 2008

The Craft Room... (Part 2)

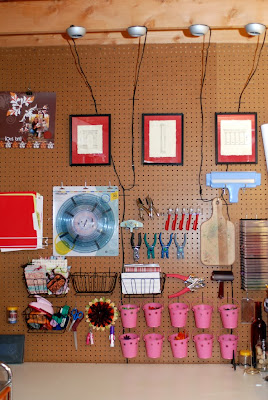
The craft room has been clean for some time, but I realized I hadn't put any more pictures of it up. So here's part two of my little craft room tour. This used to be my primary scrapping desk, but now that my computer is on the other table, that has become my primary scrapping space. Funny how that works. So here is the second table:


And some of my storage solutions... for flowers...


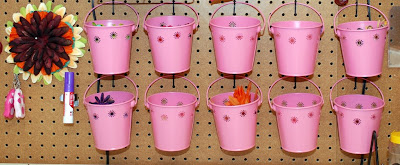
I keep smaller flowers that I have a lot of in these little buckets on my pegboard. The fasteners I used were originally intended as cord ties to keep electrical cords flat against the pegboard. But I used them for just about everything else. =D


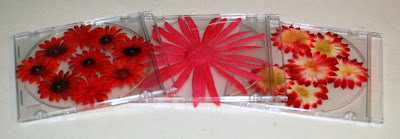
Larger flowers or smaller ones that I only have a few of are kept in jewel cases and stored by color on a CD rack I have hanging on the pegboard. It seems to be a good solution and has worked well for me.


... for mini albums...


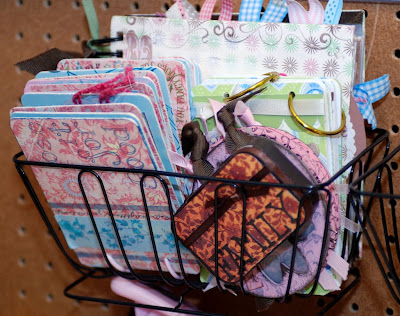
I have a few of these baskets lashed to the pegboard and one of them houses my mini albums that don't have a display home in my house yet. They're easily accessible here, and I like using them for inspiration from time to time. I'm sure I will find a different home for the mini albums at some point, but for now they're here.

... for punches...


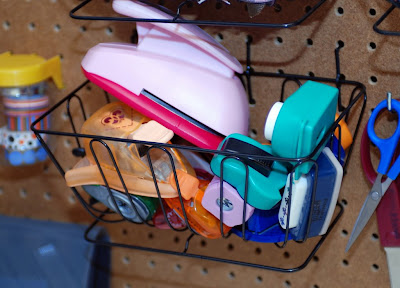
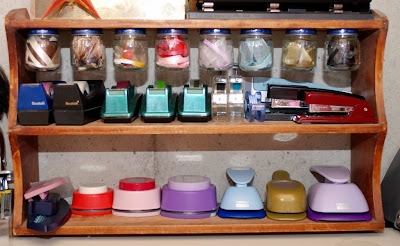
another basket I use to store my smaller punches. With the exception of my corner rounder, these are the punches I use less often, so it's not a problem keeping them together like this and digging out the one I need when it's time to use it. For my more often used larger punches, I keep them on the bottom of this shelf:


I also keep my tape dispensers on this shelf (who knew I would use so many decorative tapes?? I love them! The IOD tapes come with 3 rolls and one dispenser, so I bought additional dispensers at the dollar store so I could have them handy any time!) as well as my staplers. Along the top of the shelf I have screwed baby food jars to hold my ribbon scraps by color. These are too small to go in my other ribbon storage, but are great for little ribbon tabs and accents. The jars are easy, too... you just unscrew the jar and the lid stays in place while you get what you need from the jar. I think I learned that trick from Martha a few years ago and have just been waiting to try it out! I have to say that I like it...

That's pretty much it for this table. I try to keep as many tools as possible hanging up on the pegboard so that they have a home and aren't sitting on my workspace all the time. Other tools I have hanging above this table include my hole punches, crop-a-dile, circle cutter, paddle punches, brayer, and piercing wheels. I keep a large and small pair of scissors and gluestick at every craft table because those I need to reach all the time for large and small projects. It's just easiest if they're right there.

I've got more pictures of my craft room coming, but I figure this is good for now. Perhaps when I'm done with the whole tour (after part 6 or 7, ha ha!) I'll make up a slide show that will give you the complete look in one post. But for now we'll take it one table at a time!
Saturday, May 31, 2008

The Craft Room... (part 1)

Well, one of these days my craft room will be completely, perfectly, beautifully clean and organized. Of course, then I'll probably want to play in it and mess it all up again. So I thought I'd take pictures of it as I clean and organize and then, perhaps, you'll have a decent look at the changes I've made. I posted pictures of my craft room once before, but that was 2 years ago and it's changed a bit since then. So here is part 1 of my craft room tour:


This is one of three craft tables in my craft room. Aside from a place to work, it also houses my ribbon, cricut mats, some embellishment storage, and my computer corner! Here's a closer look at some of my storage solutions...


My homemade clip-it-up system! I used a rod from Ikea that we originally had in the kitchen when we lived in Iowa. It held our pots and pans. Then when we moved we didn't have a home for it, so we just kept it in the basement in a corner. Then one day I realized that I could hang it off my peg board and use it as the base for a storage system! I bought ringed curtain clips from Joanns and it works pretty well for storing alphabets and other embellishments. I still have a lot of embellishment filed away in the old system, but this is what I'm transitioning to.


This is the same ribbon storage solution I had a couple years ago, but I moved it to the other side of the peg board so that I could put different things over the other table. It's still a great solution for spooled ribbon and I love it!


For all of my ribbon scraps and unspooled ribbon, this is my solution. I either put the ribbon on cards or in little bags and hang them on the hooks. Each hook can hold 5-7 bags, so it's easy to thumb through them when I need to see what I have. It's a great way to keep ribbon scraps accessible for those times when you just need a few inches to complete a project! The holder is, I think, supposed to hold spools of thread or cards with DMC floss. I think. I got it at a consignment sale a few years ago when I bought two magazine racks. I got all 3 for $2, so I didn't care if I ever found a use for this since it was basically free. But now I'm glad I have it because it makes for a great storage solution!


And, of course, my computer corner! I'm really shocked that I was able to go for so long without a computer in my craft room. Granted I just brought my lap top down, but this has been SO nice to have down there! It makes it so easy to scan projects or hook up to my Cricut or watch hulu / listen to music / blog while I craft. It's great! Thank you, LEIF, for getting it all set up for me! =D

So there you have it. A mini tour of part of my craft room. Look for the other installments of this tour coming soon! =D